How to install Windows Server Essentials on a physical server – Embark on a journey to effortlessly install Windows Server Essentials on a physical server. This comprehensive guide will navigate you through every step, ensuring a seamless and efficient setup. Delve into the intricacies of server management, optimizing performance, and safeguarding your data with expert insights.
Prepare to master the art of server administration with Windows Server Essentials, empowering your organization with a robust and reliable IT infrastructure.


System Requirements

Installing Windows Server Essentials on a physical server requires specific hardware and software configurations to ensure optimal performance and compatibility.
The following are the minimum and recommended system requirements:
Minimum System Requirements
- Processor: 1.4 GHz 64-bit processor
- Memory: 512 MB RAM
- Hard disk space: 160 GB
- Network adapter: Gigabit Ethernet
- DVD drive
Recommended System Requirements
- Processor: 2 GHz or faster 64-bit processor
- Memory: 2 GB RAM or more
- Hard disk space: 250 GB or more
- Network adapter: Gigabit Ethernet
- DVD drive
Hardware Prerequisites
Before installing Windows Server Essentials, ensure that the server meets the following hardware prerequisites:
- BIOS must be set to support hardware virtualization.
- The server must have a supported network adapter.
- The server must have a DVD drive or USB drive to install the operating system.
Software Prerequisites
Before installing Windows Server Essentials, ensure that the following software prerequisites are met:
- The server must be running a supported operating system, such as Windows Server 2008 R2 or Windows Server 2012.
- The server must have the .NET Framework 3.5 or later installed.
- The server must have the Windows Management Framework 5.0 or later installed.
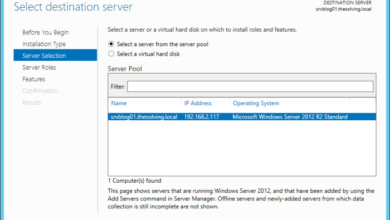
Installation Process
Installing Windows Server Essentials on a physical server is a straightforward process that can be completed in a few simple steps. This guide will provide detailed instructions on creating bootable media, booting from the media, and configuring the server settings.
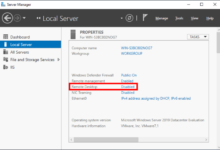
Installing Windows Server Essentials on a physical server involves preparing the hardware, creating a bootable USB or DVD, and configuring the BIOS settings. Once installed, you can manage your server remotely through the Windows Server Essentials Dashboard. For a visual representation of server maintenance tasks, including managing cloud-based servers, refer to our Cloud diagram server maintenance guide.
Additionally, troubleshooting tips will be provided to address common installation issues.
Creating Bootable Media
The first step in installing Windows Server Essentials is to create bootable media. This can be done using a USB flash drive or a DVD. To create a bootable USB flash drive, you will need a USB flash drive with at least 8GB of storage space.
To create a bootable DVD, you will need a blank DVD and a DVD burner.
- Download the Windows Server Essentials ISO file from the Microsoft website.
- Use a tool like Rufus or ISO2Disc to create a bootable USB flash drive or DVD from the ISO file.
Booting from the Media
Once you have created bootable media, you can boot from it to begin the installation process. To do this, you will need to change the boot order in your server’s BIOS settings. The boot order can usually be changed by pressing a key like F2 or Del during the boot process.
- Insert the bootable USB flash drive or DVD into your server.
- Change the boot order in your server’s BIOS settings to boot from the USB flash drive or DVD.
- Save your changes and exit the BIOS settings.
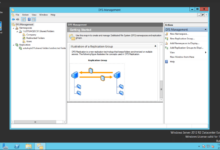
Configuring Server Settings
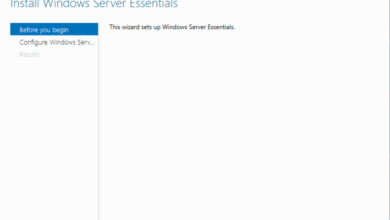
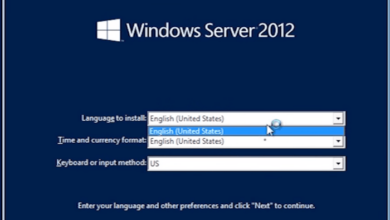
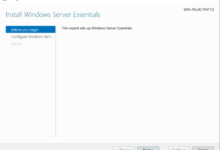
Once you have booted from the media, you will be presented with the Windows Server Essentials installation wizard. The wizard will guide you through the process of configuring the server settings. These settings include the server name, network settings, and administrator password.
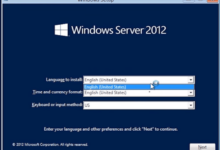
- Select the language, time and currency format, and keyboard layout.
- Click “Install Now”.
- Enter the product key for Windows Server Essentials.
- Accept the license terms.
- Select the “Custom: Install Windows only (advanced)” option.
- Select the drive on which you want to install Windows Server Essentials.
- Click “Next” to begin the installation process.
Troubleshooting Tips
If you encounter any problems during the installation process, you can refer to the following troubleshooting tips:
- Make sure that the bootable media is created correctly.
- Make sure that the boot order in your server’s BIOS settings is set to boot from the USB flash drive or DVD.
- If you are getting a “Bootmgr is missing” error, you may need to repair the boot sector.
- If you are getting a “Windows could not format the selected partition” error, you may need to delete the partition and create a new one.
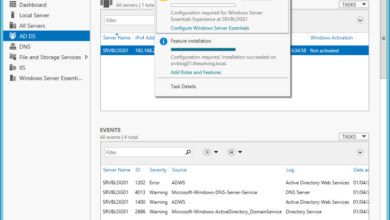
Post-Installation Configuration: How To Install Windows Server Essentials On A Physical Server
After successfully installing Windows Server Essentials, several essential configuration tasks are necessary to ensure its optimal operation and security. These include setting up networking, creating user accounts, installing necessary roles and features, and implementing appropriate security measures.
Networking Configuration
Configure the network settings to ensure proper connectivity and communication with other devices on the network. This includes assigning an IP address, subnet mask, and default gateway. Additionally, consider configuring network security settings such as firewalls and intrusion detection systems to protect against unauthorized access.
User Account Creation
Create user accounts for individuals who will be accessing the server. Assign appropriate permissions and roles to each account based on their responsibilities and access requirements. This helps maintain data security and ensures that only authorized users have access to sensitive information.
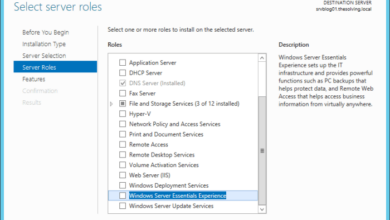
Role and Feature Installation
Install the necessary roles and features to enable specific functionalities on the server. For example, if you plan to use the server as a file server, install the File and Storage Services role. Additionally, consider installing other roles and features such as Active Directory Domain Services, DNS Server, or DHCP Server to enhance the server’s capabilities.
Security Measures, How to install Windows Server Essentials on a physical server
Implement robust security measures to protect the server and its data from unauthorized access and malicious attacks. This includes enabling strong passwords, configuring firewalls, installing antivirus software, and regularly updating the server with the latest security patches. Additionally, consider implementing additional security measures such as intrusion detection systems or data encryption to further enhance protection.
Best Practices for Server Management

Maintaining a Windows Server Essentials server requires careful planning and ongoing maintenance to ensure optimal performance, security, and data protection. Implementing best practices is crucial for effective server management and mitigating potential risks.
To optimize server performance, regular monitoring is essential. Utilize performance monitoring tools to track key metrics such as CPU utilization, memory usage, and disk space. By proactively identifying potential bottlenecks, you can address issues before they impact user experience or system stability.
As you proceed with the installation of Windows Server Essentials on your physical server, you may want to consider enhancing your server’s security posture. For a comprehensive overview of server security best practices, refer to the Cloud diagram server security resource.
This resource provides valuable insights into securing your server’s infrastructure, protecting it from potential threats. By leveraging these recommendations, you can strengthen your server’s security and ensure the integrity of your data and applications.
Updates and Patches
Applying software updates and security patches is vital for maintaining a secure and stable server environment. Microsoft regularly releases updates to address security vulnerabilities and improve system functionality. Ensure automatic updates are enabled to receive and install critical updates promptly.
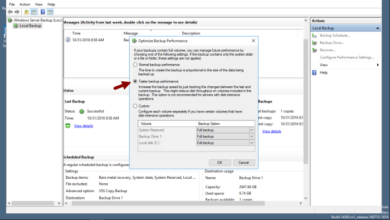
Data Backup and Recovery
Data loss can have severe consequences for any organization. Implement a comprehensive backup strategy to safeguard your critical data. Consider using a combination of local backups and cloud-based backup services to ensure data redundancy and protection against hardware failures or disasters.
Disaster Recovery Planning
Unforeseen events, such as natural disasters or power outages, can disrupt server operations. Develop a comprehensive disaster recovery plan that Artikels steps to restore critical systems and data in the event of an emergency. Regularly test the plan to ensure its effectiveness.
Advanced Configuration Options
Windows Server Essentials provides advanced configuration options for customizing the server to meet specific requirements. These options allow administrators to fine-tune network services, configure storage, and manage remote access.
One of the key advantages of Windows Server Essentials is its ease of use. The graphical user interface (GUI) makes it simple to perform basic configuration tasks. However, for more advanced tasks, administrators can use PowerShell, a command-line interface that provides access to a wider range of configuration options.
Network Services
Windows Server Essentials includes a range of network services, such as DHCP, DNS, and file sharing. These services can be configured to meet the specific needs of the network. For example, administrators can create multiple DHCP scopes to provide IP addresses to different subnets.
They can also configure DNS to resolve hostnames to IP addresses and provide load balancing for web servers.
Storage
Windows Server Essentials supports a variety of storage options, including local disks, SANs, and NAS devices. Administrators can create and manage storage pools and volumes to provide storage for files, applications, and backups. They can also configure RAID to protect data from disk failures.
Remote Access
Windows Server Essentials provides several options for remote access, including Remote Desktop, VPN, and Web Access. Administrators can configure these services to allow users to access the server from anywhere with an internet connection. They can also set up security measures to protect the server from unauthorized access.
PowerShell
PowerShell is a powerful command-line interface that provides access to a wide range of configuration options in Windows Server Essentials. Administrators can use PowerShell to automate tasks, manage the server remotely, and troubleshoot problems. PowerShell also provides access to advanced features that are not available through the GUI.
Epilogue
Congratulations! You have successfully installed and configured Windows Server Essentials on your physical server. Embrace the power of this versatile platform to streamline your IT operations, enhance collaboration, and protect your critical data. Remember, the journey of server management is an ongoing process, and we encourage you to continuously explore advanced configuration options and best practices to maximize your server’s potential.