Mastering DHCP and DNS with Windows Server Essentials: A Comprehensive Guide
How to configure Windows Server Essentials for DHCP and DNS – Embark on a journey to master the intricacies of DHCP and DNS with Windows Server Essentials! This comprehensive guide will equip you with the knowledge and skills to configure, manage, and troubleshoot these essential network services.
Delve into the depths of DHCP, unraveling the secrets of IP address assignment, lease management, and integration with DNS. Unveil the mysteries of DNS, exploring zone creation, record management, and dynamic updates.


DHCP Configuration
Windows Server Essentials simplifies network management by integrating DHCP and DNS services. DHCP dynamically assigns IP addresses to devices on the network, ensuring seamless connectivity and reducing manual configuration tasks.
Enabling and Configuring DHCP Server Role
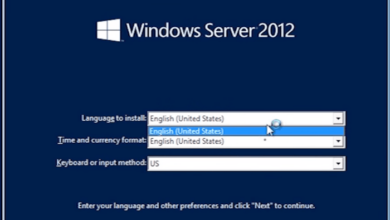
- Open Server Manager and select “Add Roles and Features.”
- In the “Select Server Roles” page, expand “Network Services” and select “DHCP Server.”
- Follow the wizard to complete the installation.
DHCP Scope Creation
A DHCP scope defines the range of IP addresses that can be assigned to clients. To create a scope:
- Open the DHCP console and right-click the server name.
- Select “New Scope.”
- Configure the scope properties, including IP address range, subnet mask, and default gateway.
- Click “Next” to complete the scope creation.
DHCP Lease Duration and Reservation Settings
DHCP leases specify the duration for which IP addresses are assigned to clients. You can configure lease duration and reservation settings in the DHCP console:
- Select the DHCP scope and right-click “Properties.”
- In the “Lease Duration” tab, configure the lease duration and renewal settings.
- In the “Reservations” tab, add MAC addresses of specific clients to reserve specific IP addresses for them.
DNS Configuration
DNS, or Domain Name System, plays a vital role in the internet by translating domain names into IP addresses. This allows devices to connect to websites and other online services. Configuring DNS on Windows Server Essentials is a straightforward process that can be completed in a few simple steps.
To set up DHCP and DNS on Windows Server Essentials, you’ll need to create a DHCP scope and configure DNS settings. If you’re looking for more information on maintaining your server, check out our Cloud diagram server maintenance guide. It covers everything from monitoring performance to troubleshooting issues.
Once you’ve got DHCP and DNS configured, you’ll be able to provide IP addresses and DNS services to your network devices, ensuring they can communicate with each other and access the internet.
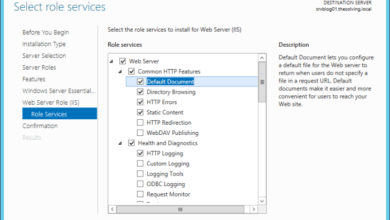
To install and configure the DNS server role on Windows Server Essentials, follow these steps:
- Open Server Manager and click on “Add Roles and Features”.
- Select “DNS Server” from the list of roles and click on “Next”.
- On the “Select Features” page, leave the default settings and click on “Next”.
- On the “Confirm Installation Selections” page, click on “Install”.
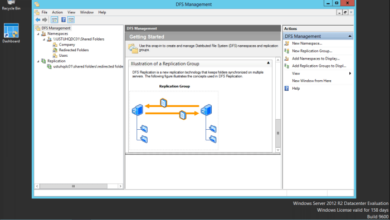
Once the DNS server role has been installed, you can begin configuring it. To create a new DNS zone, follow these steps:
- Open DNS Manager and click on “Forward Lookup Zones” in the left-hand pane.
- Right-click on “Forward Lookup Zones” and select “New Zone”.
- On the “New Zone Wizard” page, select “Primary zone” and click on “Next”.
- Enter the name of the zone (e.g. example.com) and click on “Next”.
- On the “Zone File” page, leave the default settings and click on “Next”.
- On the “Dynamic Update” page, select “Do not allow dynamic updates” and click on “Next”.
- On the “Completing the New Zone Wizard” page, click on “Finish”.
To create a reverse lookup zone, follow the same steps as above, but select “Reverse Lookup Zones” in the left-hand pane of DNS Manager.
Once you have created a DNS zone, you can begin managing DNS records. To create a new A record, follow these steps:
- Open DNS Manager and click on the zone that you want to manage.
- Right-click on the zone and select “New Host (A or AAAA)”.
- Enter the name of the host (e.g. www) and the IP address of the host.
- Click on “OK” to create the new record.
To create a new CNAME record, follow the same steps as above, but select “New Alias (CNAME)” instead of “New Host (A or AAAA)”.
To create a new MX record, follow the same steps as above, but select “New Mail Exchanger (MX)” instead of “New Host (A or AAAA)”.
DHCP and DNS Integration: How To Configure Windows Server Essentials For DHCP And DNS

Integrating DHCP and DNS servers is crucial for seamless network configuration. It enables DHCP clients to automatically obtain both IP addresses and DNS information, streamlining the process of connecting to the network and accessing resources.
DNS Dynamic Update Settings for DHCP Clients
To ensure that DNS records are updated dynamically as DHCP clients receive IP addresses, configure the following settings:*
When configuring Windows Server Essentials for DHCP and DNS, it’s crucial to consider best practices for server architecture. Referring to Cloud diagram server best practices can provide valuable insights into optimizing server performance and security. These guidelines will help you navigate the configuration process effectively, ensuring a reliable and secure network infrastructure for your Windows Server Essentials deployment.
-*Enable Dynamic DNS Updates
Allow DHCP clients to update their DNS records on the DNS server.
-
-*Specify the DNS Update Style
Choose whether clients should update records using FQDN (fully qualified domain name) or relative names.
-*Configure the DNS Update Interval
Set the frequency at which clients should send update requests to the DNS server.
Troubleshooting Common Issues Related to DHCP and DNS Integration
When integrating DHCP and DNS servers, various issues can arise:*
-*DHCP Clients Not Receiving DNS Information
Verify that the DHCP server is configured to provide DNS information and that clients are obtaining it correctly.
-
-*DNS Records Not Updating Dynamically
Ensure that dynamic DNS updates are enabled on both the DHCP server and DNS server, and check the update settings.
-*DNS Server Not Responding
Test the DNS server’s connectivity and ensure that it is running properly.
Security Considerations
Implementing DHCP and DNS services on Windows Server Essentials requires careful consideration of security measures to protect against unauthorized access, data manipulation, and denial-of-service attacks.
DHCP Server Hardening
Securing the DHCP server involves implementing techniques such as authorization and encryption to prevent unauthorized access and data tampering.
- Authorization:Restrict access to the DHCP server by configuring authorization mechanisms such as IP address filtering or RADIUS authentication.
- Encryption:Enable DHCPv6 to secure DHCP traffic with encryption and prevent eavesdropping or data modification.
DNS Security Measures, How to configure Windows Server Essentials for DHCP and DNS
DNS security involves implementing measures like DNSSEC and controlling zone transfers to protect against DNS spoofing, cache poisoning, and unauthorized modifications.
- DNSSEC (Domain Name System Security Extensions):DNSSEC provides cryptographic verification of DNS data to prevent unauthorized modifications and spoofing.
- Zone Transfers:Configure secure zone transfers by restricting the servers allowed to transfer DNS zone data, preventing unauthorized updates.
Troubleshooting DHCP and DNS

DHCP and DNS are essential services for any network, and troubleshooting them can be a challenge. This guide will provide you with a troubleshooting guide for common DHCP and DNS issues, including how to identify and resolve DHCP lease conflicts and DNS resolution failures.
DHCP Lease Conflicts
A DHCP lease conflict occurs when two or more devices on a network are assigned the same IP address. This can happen if a DHCP server is not properly configured, or if a device has a static IP address that is in conflict with the DHCP server’s range.
To resolve a DHCP lease conflict, you can try the following steps:
- Check the DHCP server’s configuration to make sure that it is properly configured.
- Check the IP addresses of the devices on the network to make sure that they are not in conflict with the DHCP server’s range.
- If a device has a static IP address that is in conflict with the DHCP server’s range, you can either change the device’s IP address or disable DHCP on the device.
DNS Resolution Failures
DNS resolution failures occur when a device cannot resolve a domain name to an IP address. This can happen if the DNS server is not properly configured, or if the device’s DNS settings are incorrect.
To resolve a DNS resolution failure, you can try the following steps:
- Check the DNS server’s configuration to make sure that it is properly configured.
- Check the DNS settings on the device to make sure that they are correct.
- If the DNS settings on the device are correct, you can try flushing the DNS cache on the device.
Advanced Troubleshooting Techniques
If you are unable to resolve a DHCP or DNS issue using the steps above, you can try using advanced troubleshooting techniques, such as using Event Viewer and Network Monitor.
Event Viewer can be used to view events that are logged by the DHCP and DNS services. This can help you to identify the cause of a problem.
Network Monitor can be used to capture network traffic. This can help you to identify the source of a problem.
Final Thoughts
With this newfound expertise, you will be empowered to optimize network performance, enhance security, and ensure seamless connectivity for your users. Embrace the challenges of network management with confidence, knowing that you possess the knowledge to conquer any DHCP or DNS hurdle that may arise.